Creating Your Book Template in Adobe Illustrator
Read on for instructions on creating your book template in Adobe Illustrator.
When you’re creating a book in Adobe Illustrator, it’s important to start with the right settings so your project prints exactly the way you expect. With PrintNinja, you’ll have a prepress expert to help make sure your files are print-ready, but the best way to make sure this process goes smoothly is to start with the correct file setup. Follow our step-by-step instructions for creating your book template.
Getting Started
- In Illustrator, go to File -> New
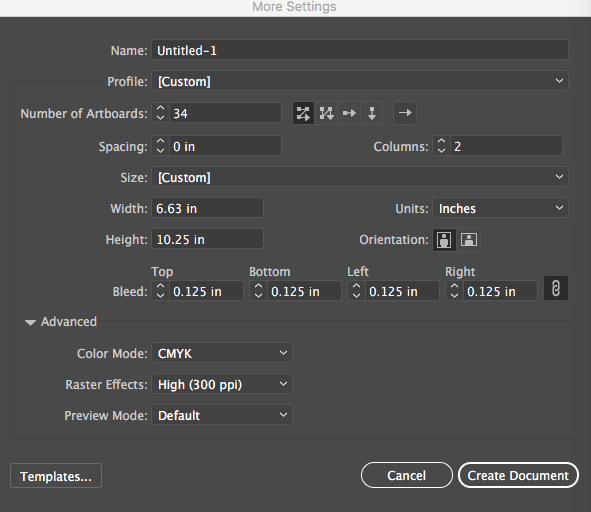
- The Number of Artboards will be your interior page count plus your inside front and back cover pages (as well as endsheets if your project requires them). Your cover spread will be created separately.
PLEASE NOTE: If you are designing a saddle-stitch booklet for a GAME PROJECT, you need to reference this page. Saddle-stitch booklets for game projects have a different set of rules.
- Make sure the first button to the right of the Number of Artboards is selected.
- Enter 0 for the spacing and any number you want for the columns (this will be the number of pages per row).
- Enter your page size (this is the final trim size of your book) and .125” bleed to all four sides.
- You may also decide to set your pages up as two page spreads. If so, divide the number of artboards by two (each artboard would consist of two pages), enter 1 for the columns, and double your page width. You should keep the amount of bleed the same.For HARDCOVER projects, we recommend keeping all crucial text and artwork at least .125” from the bound sides of the page.
For SOFTCOVER projects, we recommend keeping all crucial text and artwork at least .40” from the bound sides of the page.
For SPIRAL/WIRE BOUND projects, we recommend keeping all crucial text and artwork at least .45” from the bound sides of the page to avoid the hole punches for the wire/spiral coil interfering with the artwork and readability. - In the Advanced section choose CMYK as your color mode and 300 ppi as your resolution under Raster Effects.
- Click OK to create your project document. Your inside front cover will be the first page in the top left and will proceed in reading order.
- NOTE: Keep in mind that Illustrator has a limited canvas size, which means the total width of each row of pages and total height of each column of pages cannot exceed 227.5” (including bleed). If you are working on a long book then you may need to split your project up into multiple files.
Exporting your Book Template as a PDF in Illustrator
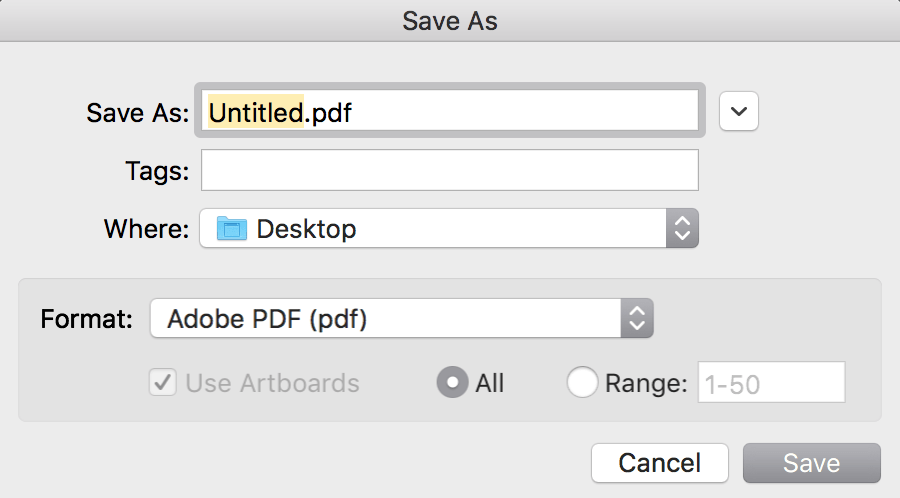
- When your pages are all designed and you are ready to export your pages as a print-ready PDF, go to File -> Save As
- Choose Adobe PDF as your file format.
- At the top choose High Quality Print as your preset, though we will be making some changes.
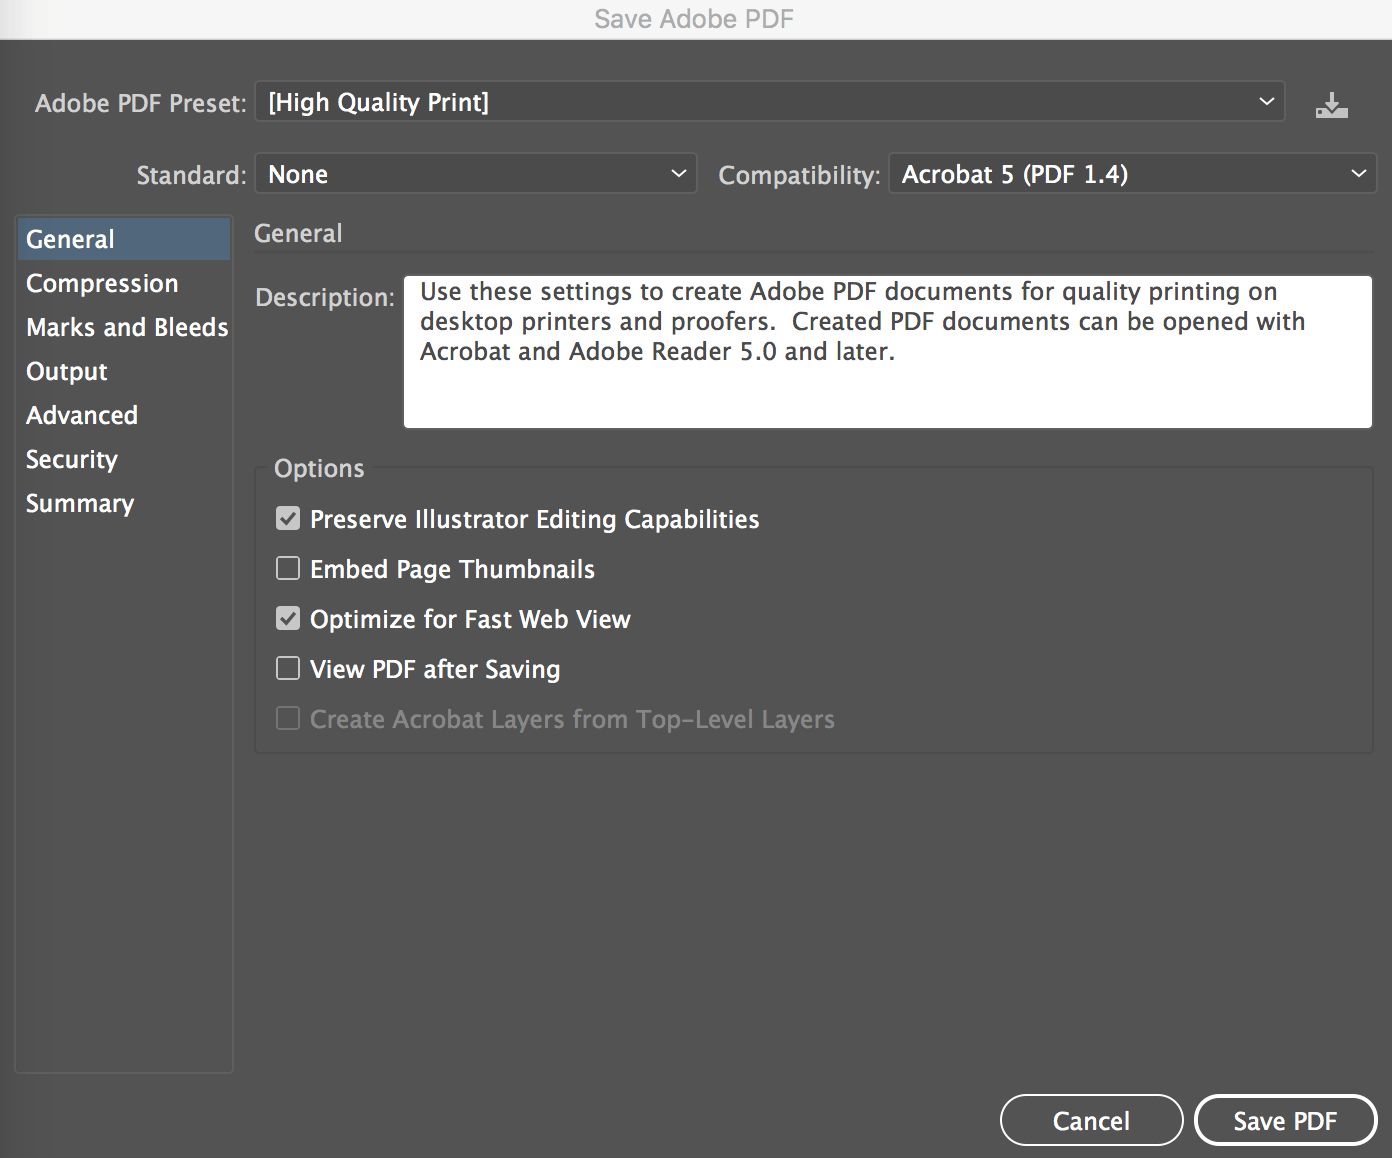
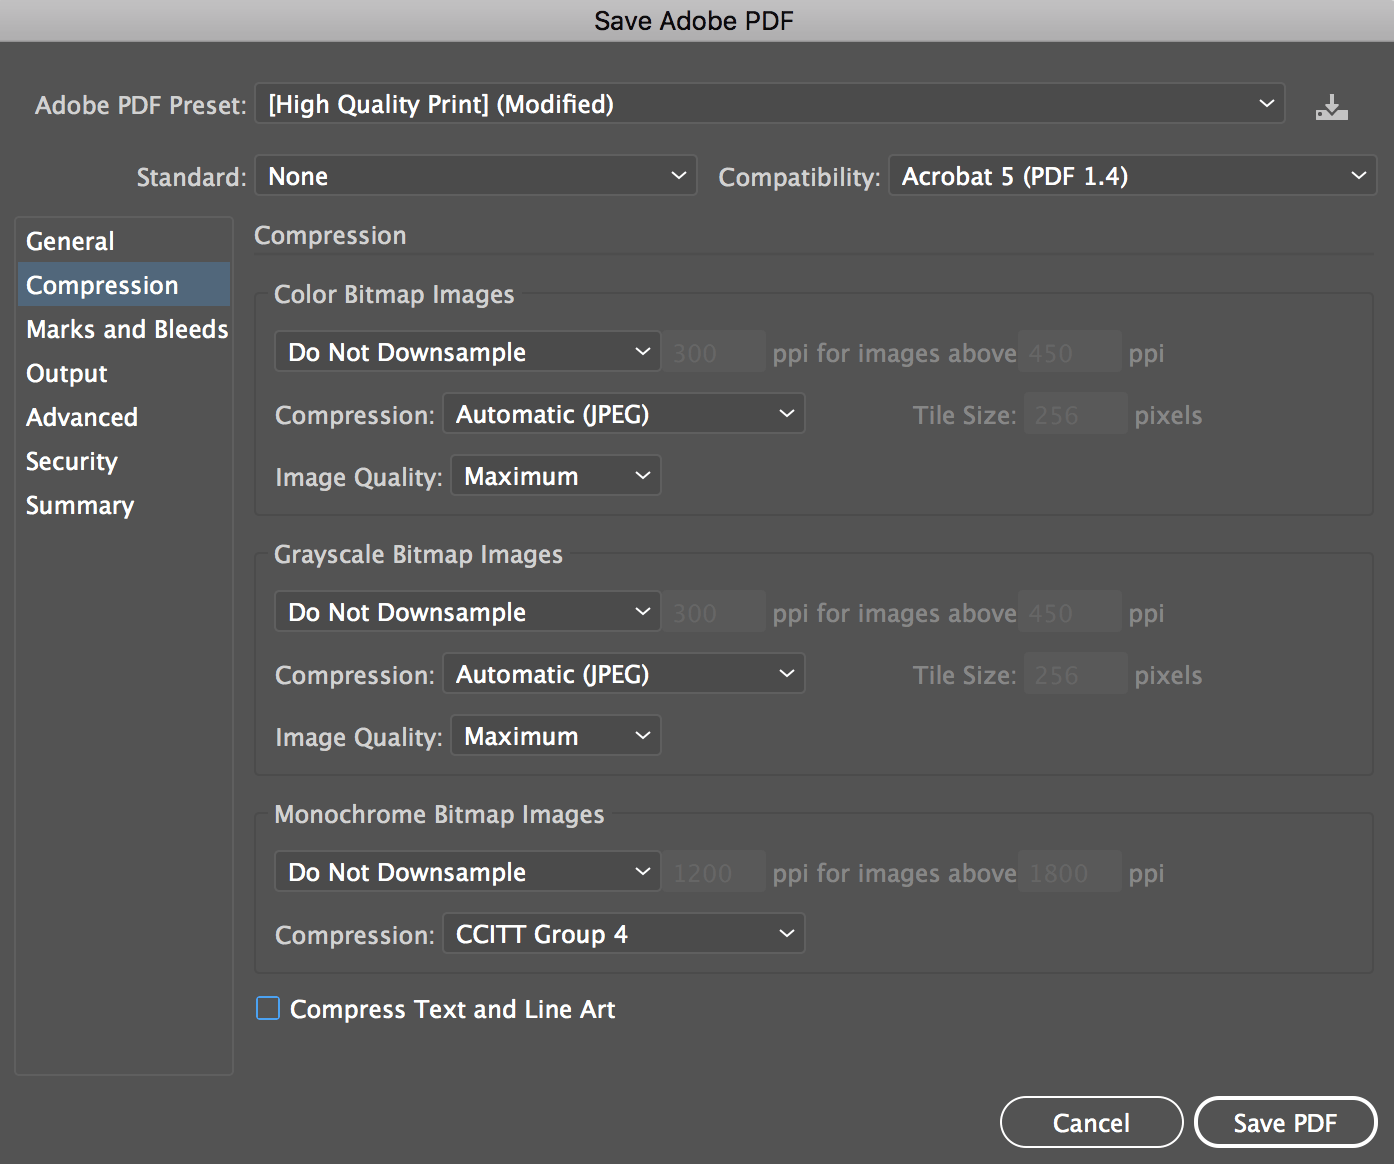
- In the Compression tab turn off all compression settings to avoid unnecessary quality loss. The only time to select these options is if your images have a very high resolution. 300 pixels/dots per inch is ideal for print, but we will accept up to 400 ppi/dpi. Anything above that cannot be accurately reproduced by offset printing presses, so choose Bicubic Sampling To 300 ppi for images above 400ppi if you find yourself in this position.
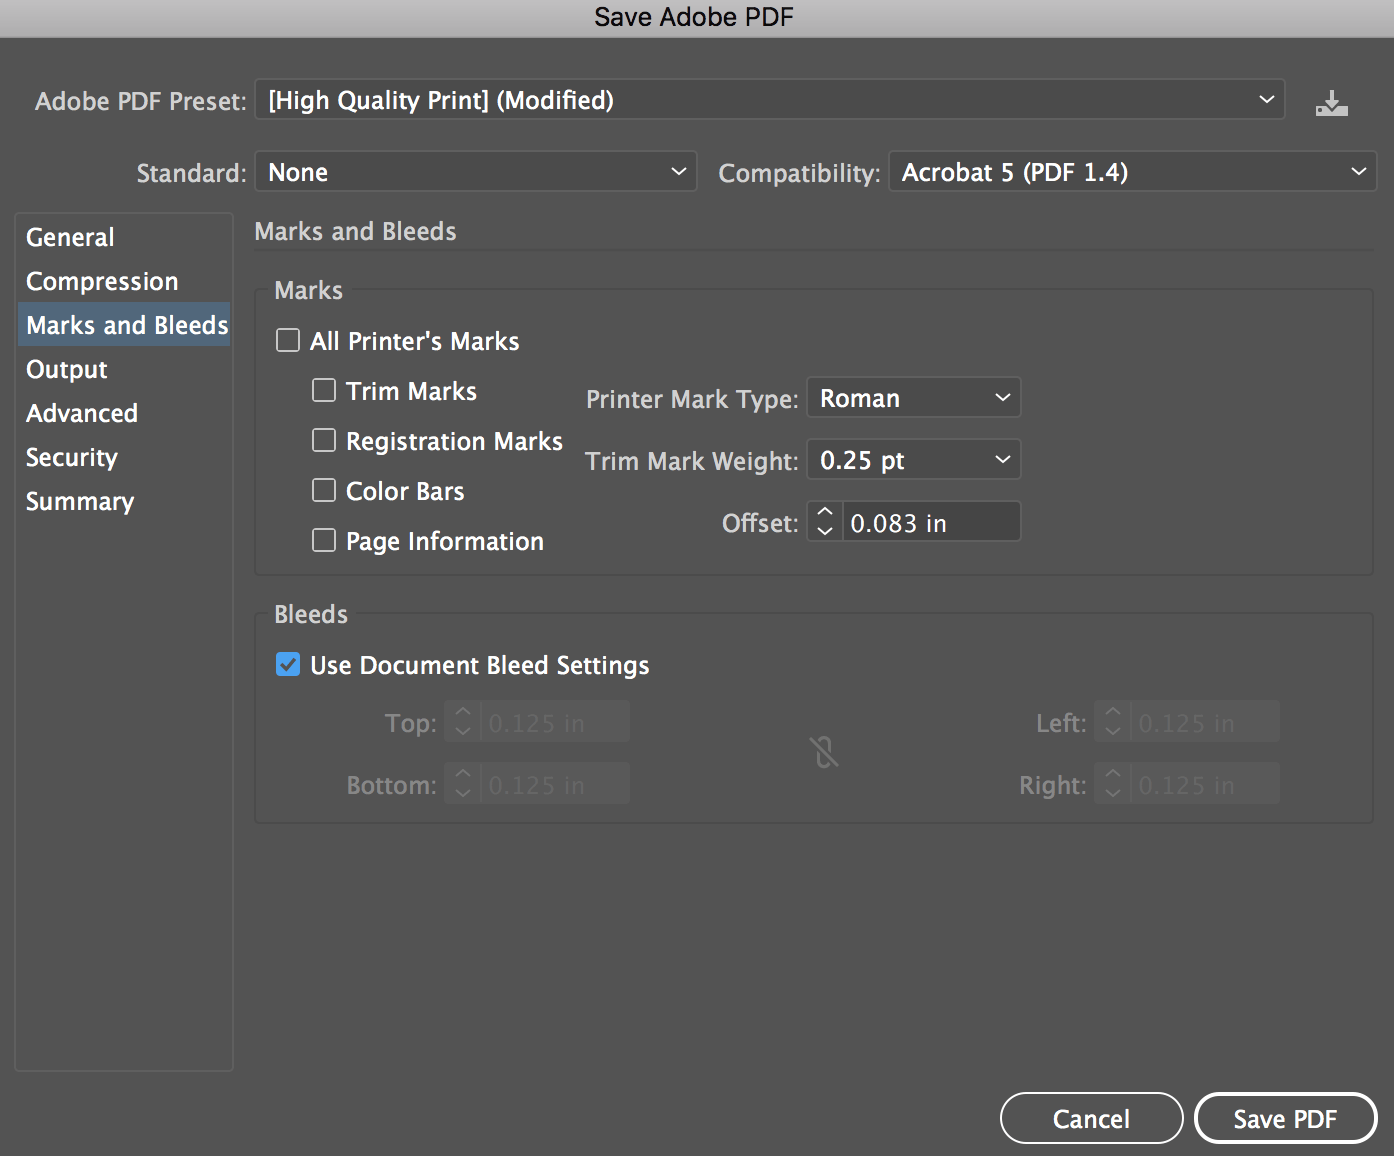
- Turn off all printer’s marks in the Marks and Bleeds tab, and make sure to select Use Document Bleed Settings.
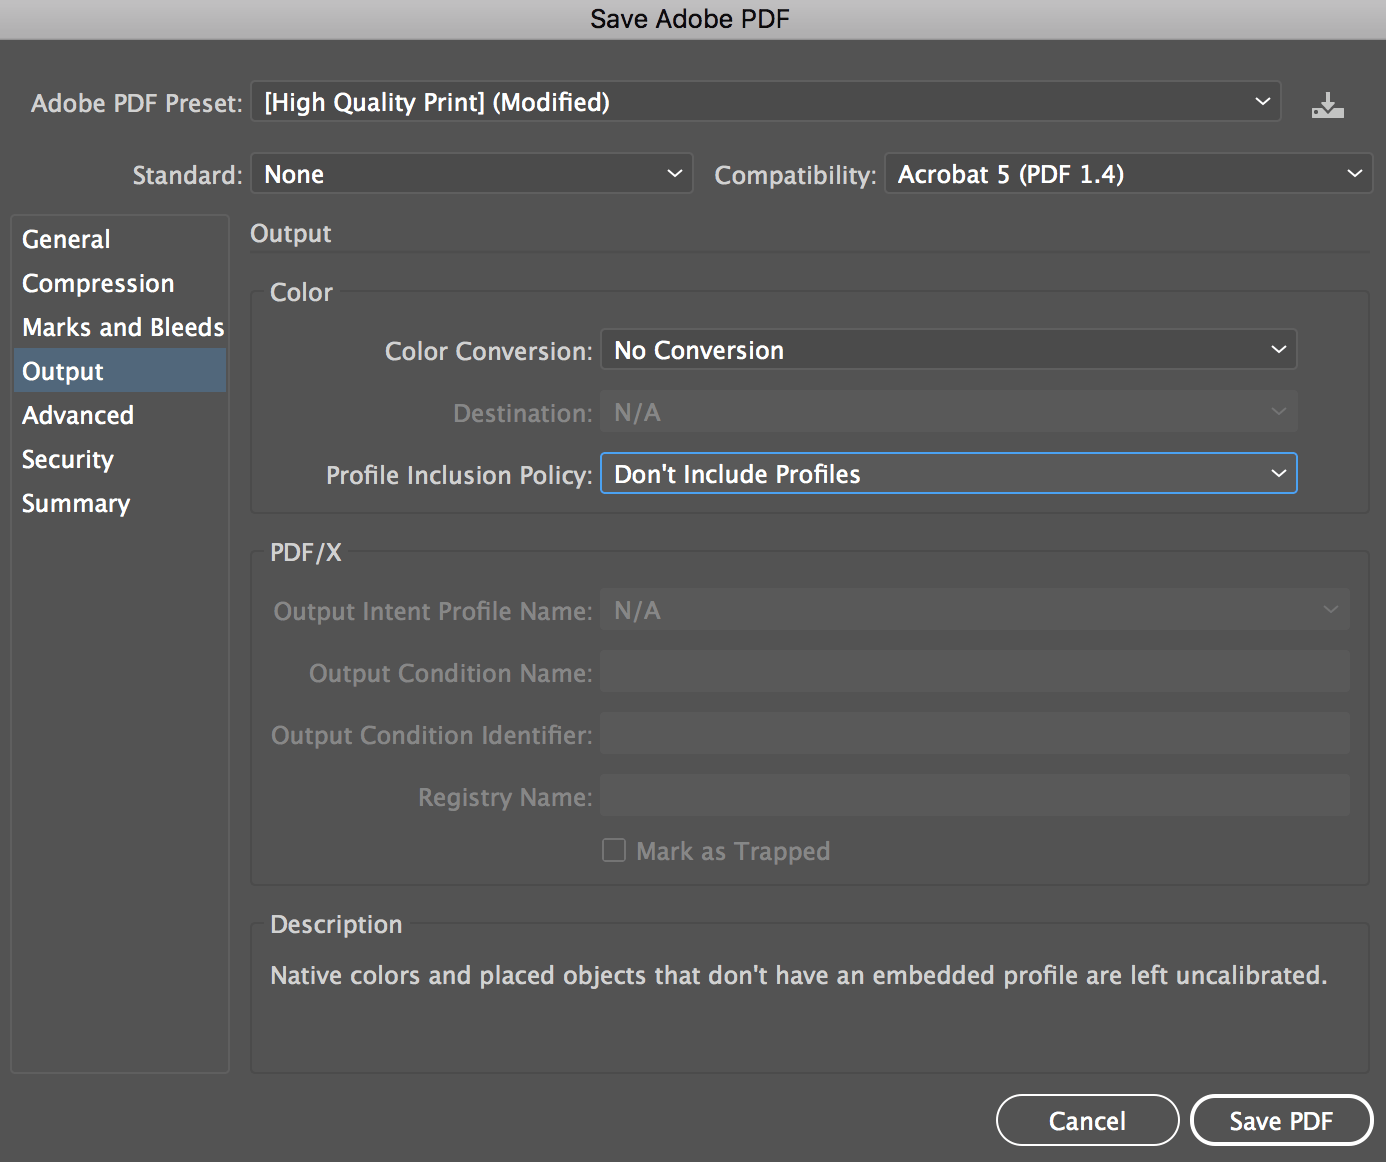
- In the Output tab choose No Color Conversion and Don’t Include Profile.
- Click Save PDF to save your print-ready PDF.
- You now have an interior page template to design your project around.