PrintNinja - online printing made easy for creators
How to Create a ZIP Folder Archive
Do you have a significant number of artwork files to upload for your order?
You can easily turn multiple files into one file by compressing them into a .ZIP folder archive. Depending on how many components your order includes and how your artwork files were prepared, you may have multiple files to upload. While our system does allow you to upload up to five files at once, if you find yourself needing to make multiple uploads for each round of proofing, it may be more efficient to create .ZIP folder archives and then upload the resulting .ZIP file(s). Note that our upload system can only accept files that are smaller than 2GB, so you may need to break up your files into multiple .ZIP folder archives.
Is your design program crashing everytime you try to export your artwork?
This is more than likely because you are trying to export out a file larger than 2GB. Remember, creating your artwork at a resolution higher than 300DPI does not improve the overall print quality. Rather, in many cases it can actually cause crashes in both our and our vendors’ prepress programs. If you find your artwork file is over 2GB or your design program keeps crashing when trying to export out a multiple-page PDF we recommend doing one of the following:
- Save each page/spread as INDIVIDUAL PDF files.
- Try exporting out the pages/spreads in BATCHES instead of the whole book
at once.
Whichever option you choose, you should now have multiple files that you are ready to upload. If you have less than five files that total less than 2GB in file size, you can go ahead and upload them as-is. If you have more than five files or your total file size is over 2GB, we recommend the following instructions to compress multiple files into one .ZIP folder archive (note that you can further organize your files into subfolders before compression if you’d like):
MAC:
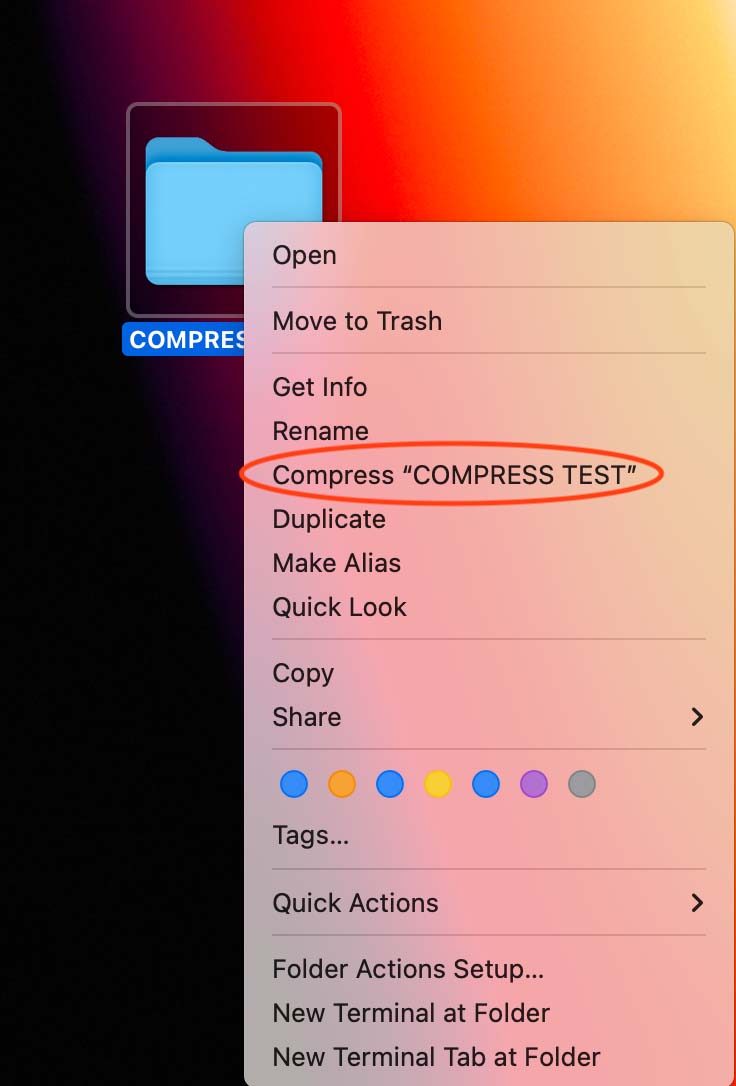
Select the file(s) and/or folder(s) you want to compress. Right-click on your selection and click “Compress”:
PC:
Select the file(s) and/or folder(s) you want to compress. Right-click on your selection and click “Send to”, then click “Compressed (zipped) folder”.
This will compress your selection and allow you to upload the artwork.
