Creating a Book Template in Adobe InDesign
Read on for instructions on creating a book template in Adobe InDesign.
For years, PrintNinja has been the premier offset printer for independent creators, self-publishers, and small businesses. We specialize in high-quality printing services at prices that only offset printing can bring you.
One of the most intimidating steps during the printing process is properly setting up files for the press. However, this process is easier that it appears. Over the years we’ve been printing books, games, and more, we have seen projects of all layouts and formats. We’ve created the instructions below to make sure your files are setup to print exactly how you envision them.
How to Create a Template In Adobe InDesign
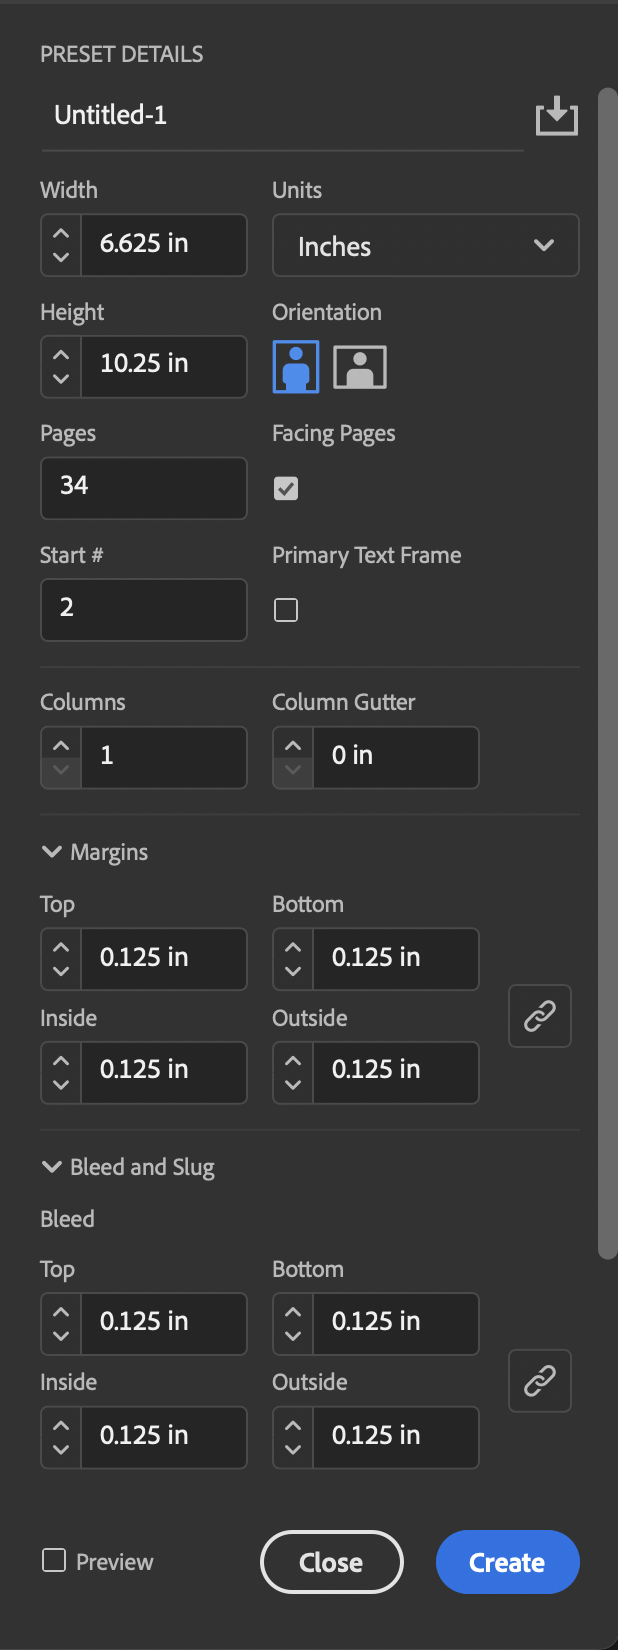
- In InDesign, select File > New > Document
- Choose Print as your Intent.
- Make sure Facing Pages is selected, this creates a spread
- For the number of pages, enter your interior page count plus your inside front and back cover pages (as well as end sheets if your project requires them). Your cover spread will be created separately.
PLEASE NOTE: If you are designing a saddle-stitch booklet for a GAME PROJECT, you need to reference this page. Saddle-stitch booklets for game projects have a different set of rules.
- Your Start Page # will be 2.
- Enter your page size (this is the final trim size of your book).
- The margins will be used to show the safe area. For most projects we recommend keeping all important text and images at least 0.125” away from the trim line, but if you would like your pages to have an even border around them (for example, around the panels on a comic page) then we recommend increasing this to 0.25”.For HARDCOVER projects, we recommend keeping all crucial text and artwork at least .125” from the bound sides of the page.
For SOFTCOVER projects, we recommend keeping all crucial text and artwork at least .40” from the bound sides of the page.
For SPIRAL/WIRE BOUND projects, we recommend keeping all crucial text and artwork at least .40” from the bound sides of the page to avoid the hole punches for the wire/spiral coil interfering with the artwork and readability.
- Enter 0.125” for the bleed on all sides.
- If you aren’t don’t use InDesign often, your set your unit of measurement may default to picas. To change this, go to InDesign > Preferences > Units & Increments and choose Inches for Horizontal and Vertical.
- Click OK to create your project document. Your inside front cover will be the first page on the left and will proceed in reading order.
Exporting Your Book Template as a PDF in InDesign
- When your pages are all designed and you are ready to export your pages as a print-ready PDF, go to File > Export
- Choose Adobe PDF (Print) as your format.
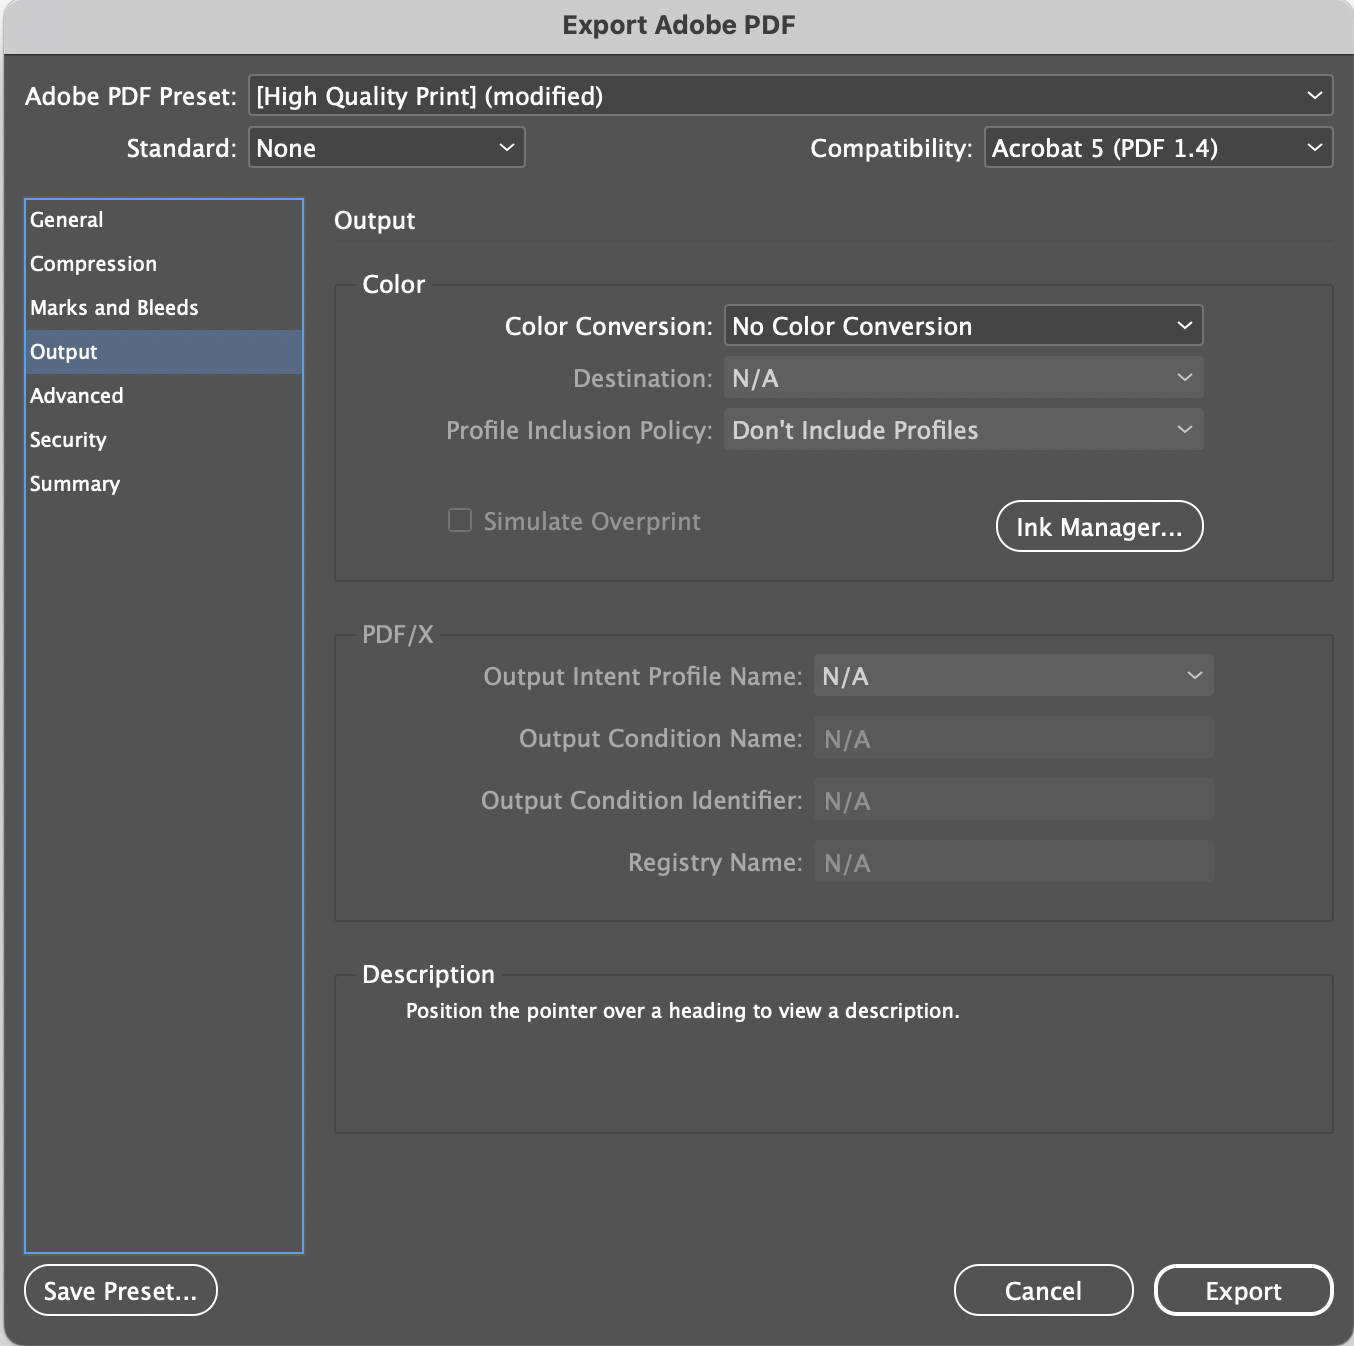
- At the top, select High Quality Print as your preset, though we will be making some changes.
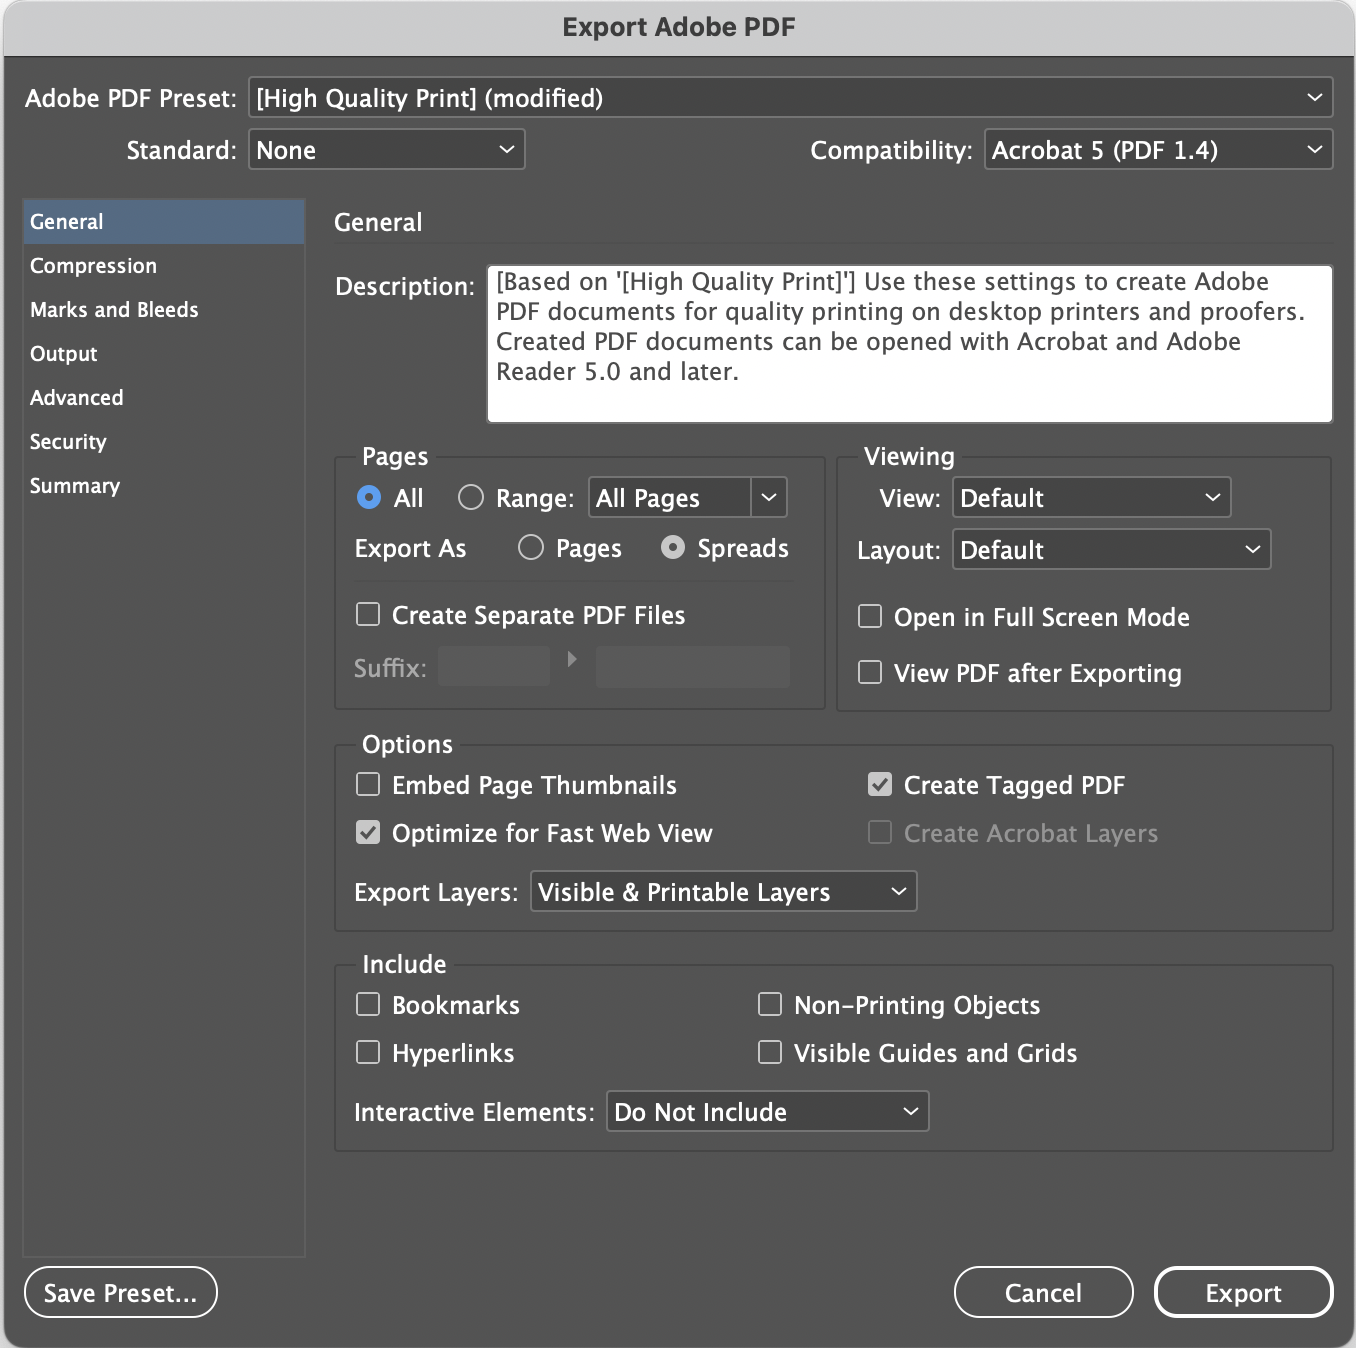
- In the General tab make sure to export all pages as spreads.
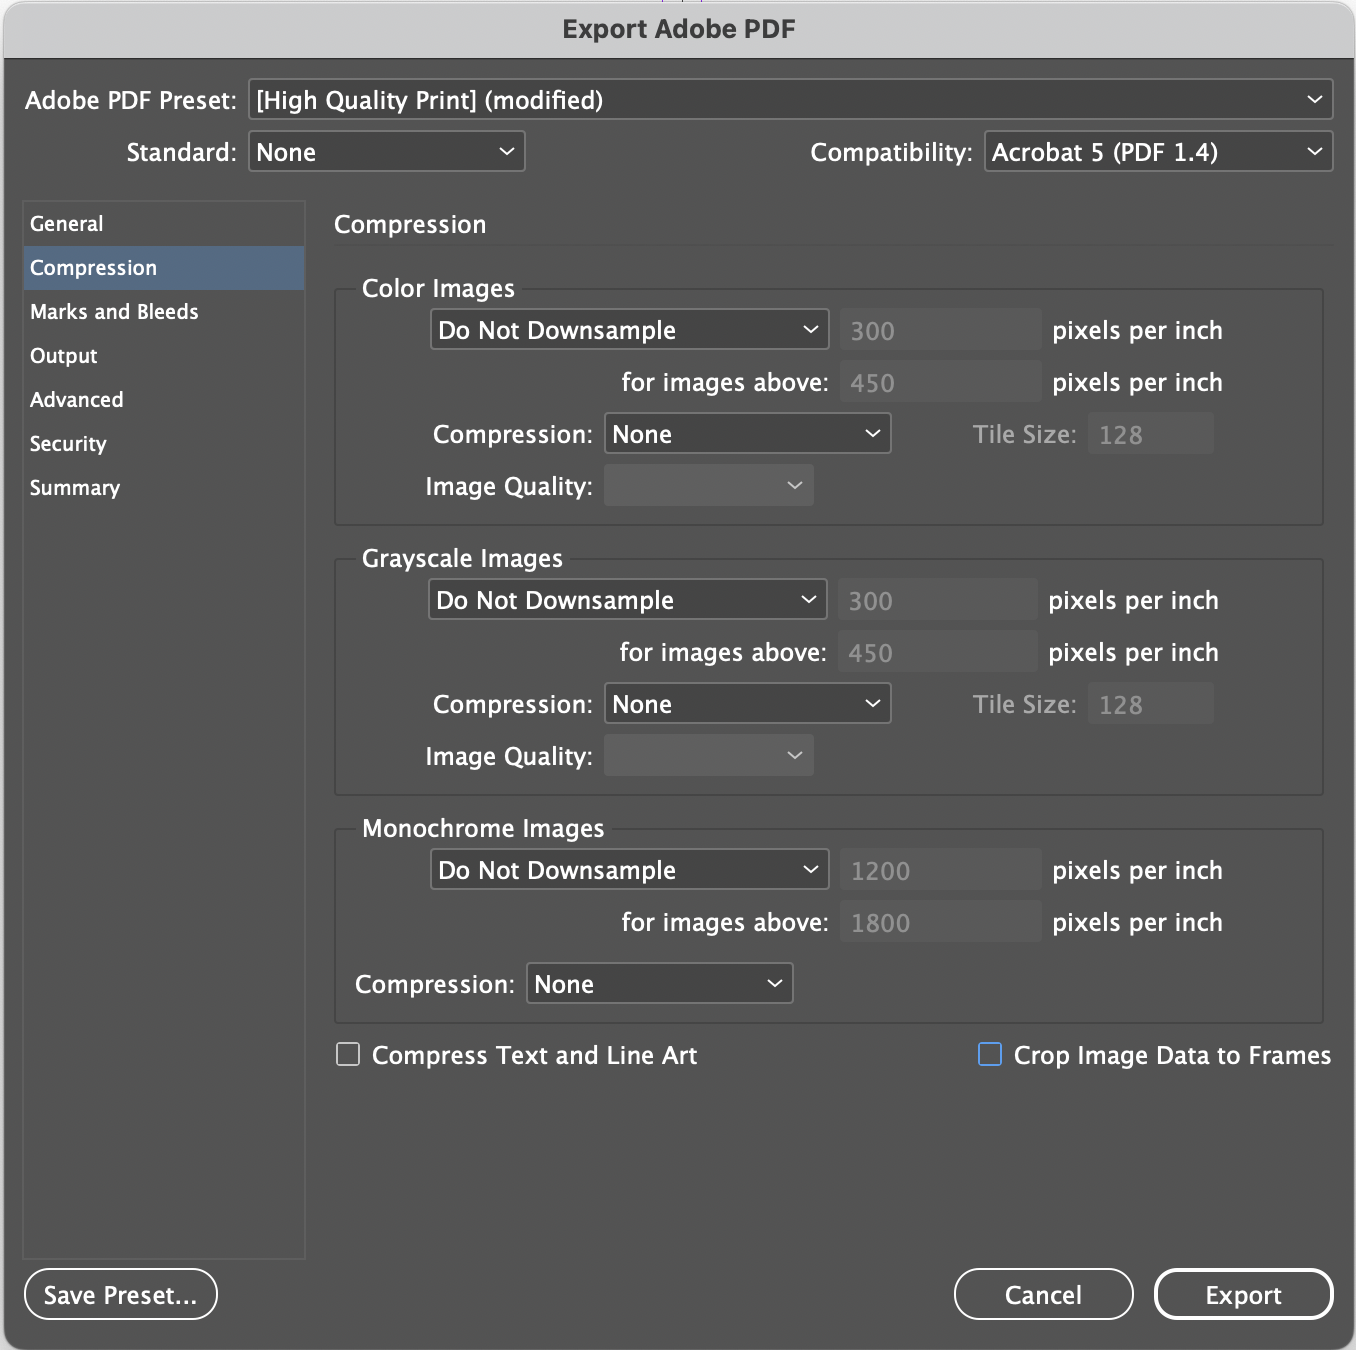
- In the Compression tab, turn off all compression settings to avoid unnecessary quality loss. The only time to select these options is if your images have a very high resolution. 300 pixels/dots per inch is ideal for print, but we will accept up to 400 ppi/dpi. Anything above that cannot be accurately reproduced by offset printing presses, so choose Bicubic Sampling To 300 ppi for images above 400ppi if you find yourself in this position.
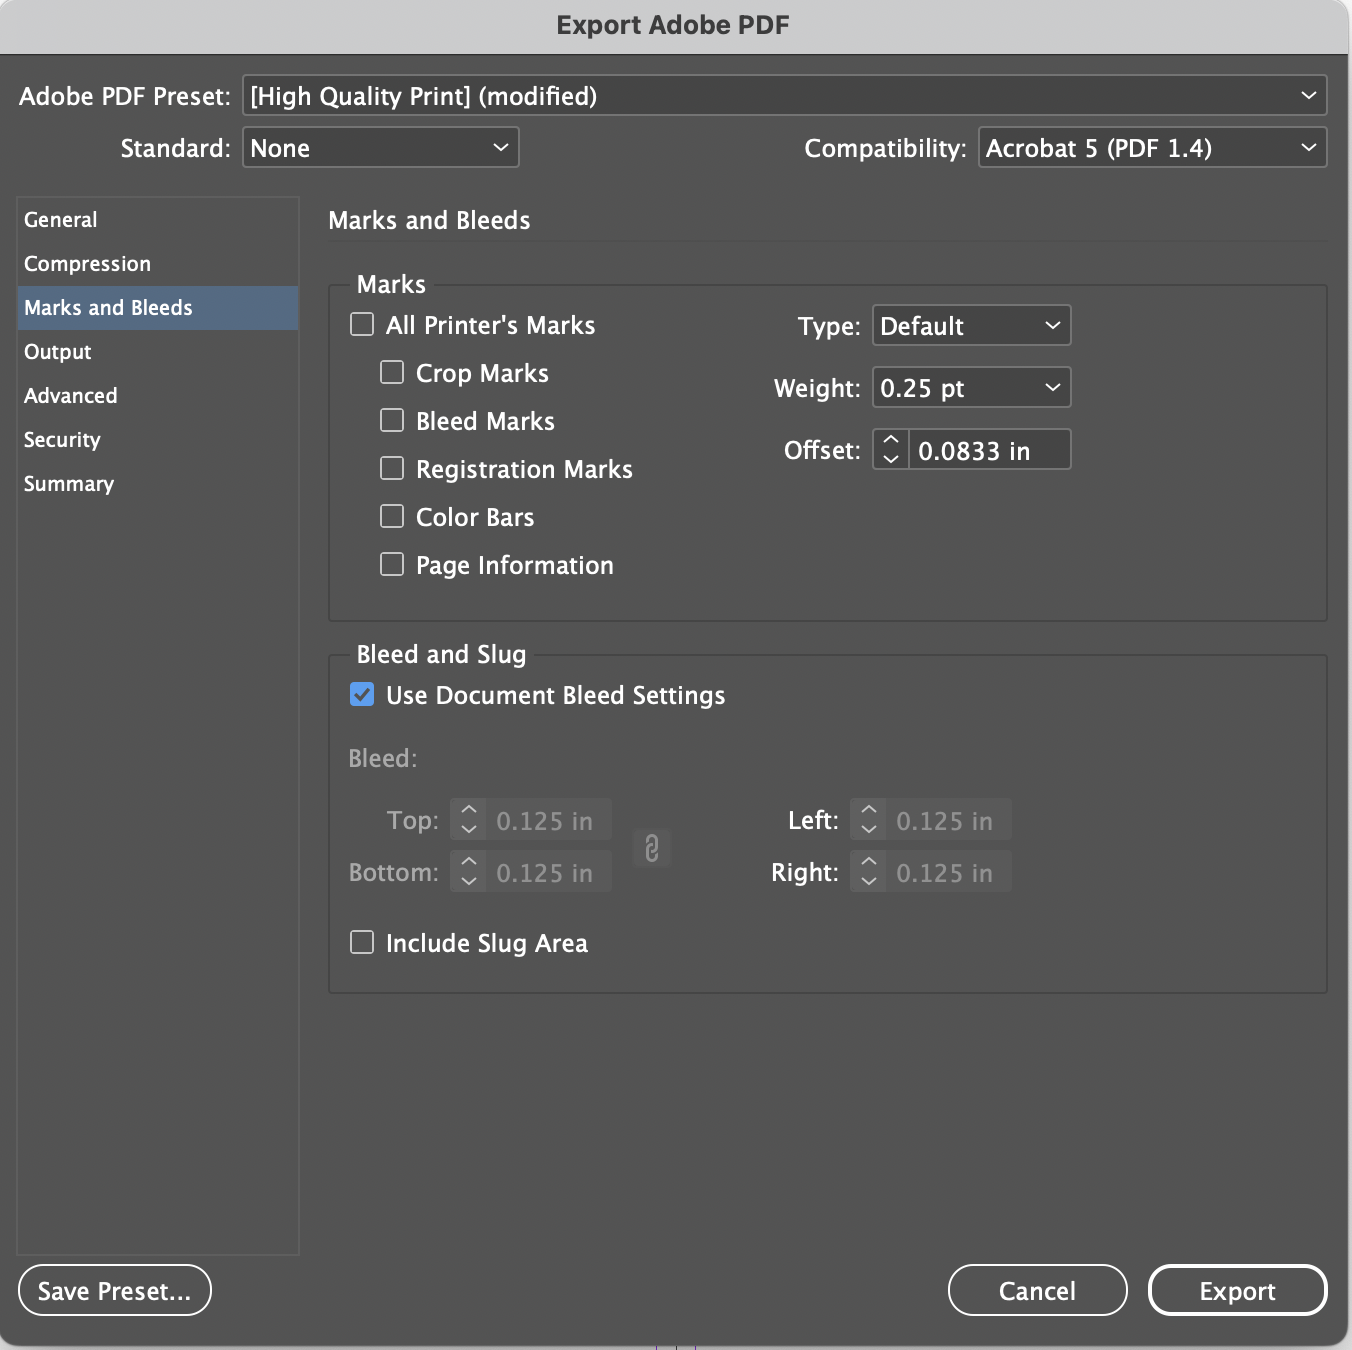
- Turn off all printer’s marks in the Marks and Bleeds tab, and make sure to select Use Document Bleed Settings.
- In the Output tab, if your images are in CMYK choose No Color Conversion. If your images are in RGB, choose Convert to Destination (Preserve Numbers) and select Japan Color 2001 Coated (if you will be printing on coated paper) or Japan Color 2001 Uncoated (if you will be printing on uncoated paper) as your profile. In both cases make sure to choose Don’t Include Profiles.
- Click Export to save your print-ready PDF.
- You now have an interior page template to design your project around.
Get an instant quote
Now that you have print-ready files, check out our instant price calculator to experiment with specialty options and get your price!
Get Your Quote