PrintNinja - online printing made easy for creators
Hardcover Accordion/Wire/Spiral Bound Book Cover Template
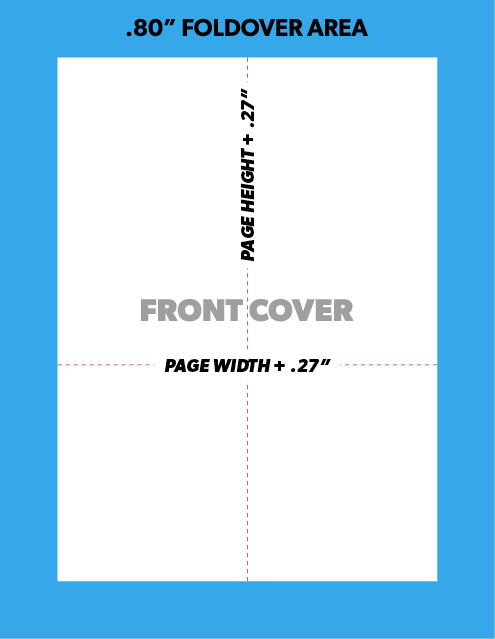
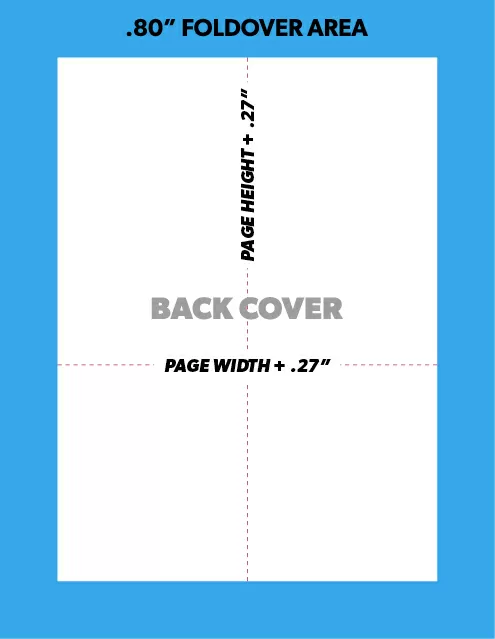
Because a single sheet of paper is wrapped around and glued to the inside of two separate greyboard sheets, the artwork for a casebound cover on an accordion or wire/spiral bound project needs to be submitted as 2 separate PDFs.
Setup Guide
Total Cover Height:
- Begin with the height of your panels.
- Add 0.27 inches to the panel height.
- Add 0.8 inches to both the top and bottom (1.6 inches total) of the new panel height for the foldover. This area is printed, folded over, and glued to the inside of the greyboard case to hold everything together. You can learn more about this process on our Hardcover and Casebound Binding We recommend extending your artwork to the edge of the foldover area, even though most of it will not be visible.
- You have now calculated your total cover page height (including the foldovers).
Total Cover Width:
- Begin with the width of your panels.
- Add 0.27 inches to the panel width.
- Add 0.8 inches to both the left and right (1.6 inches total) of the new page width for the foldover. This area is printed, folded over, and glued to the inside of the greyboard case to hold everything together. You can learn more about this process on our Hardcover and Casebound Binding We recommend extending your artwork to the edge of the foldover area, even though most of it will not be visible.
- You have now calculated your total cover page width (including the foldovers).
Again, be sure to create 2 pages in your design program to account for the FRONT and BACK covers.
See below for a visual example of above:


Wire/Spiral Bound Casebound Cover Setup Example
Let’s use a 5” x 7” book as an example.
To find the total cover height you would add 0.27” to 7” giving you 7.27”. You would then add 1.6” for both the top and bottom foldover areas (0.8 * 2). This would give you a total cover height of 8.87”.
To find the total cover width you would add 0.27” to 5” giving you 5.27”.You would then add 1.6” for both the left and right foldover areas (0.8 * 2). This would give you a total cover width of 6.87”.
How to Create a Template in Adobe Indesign
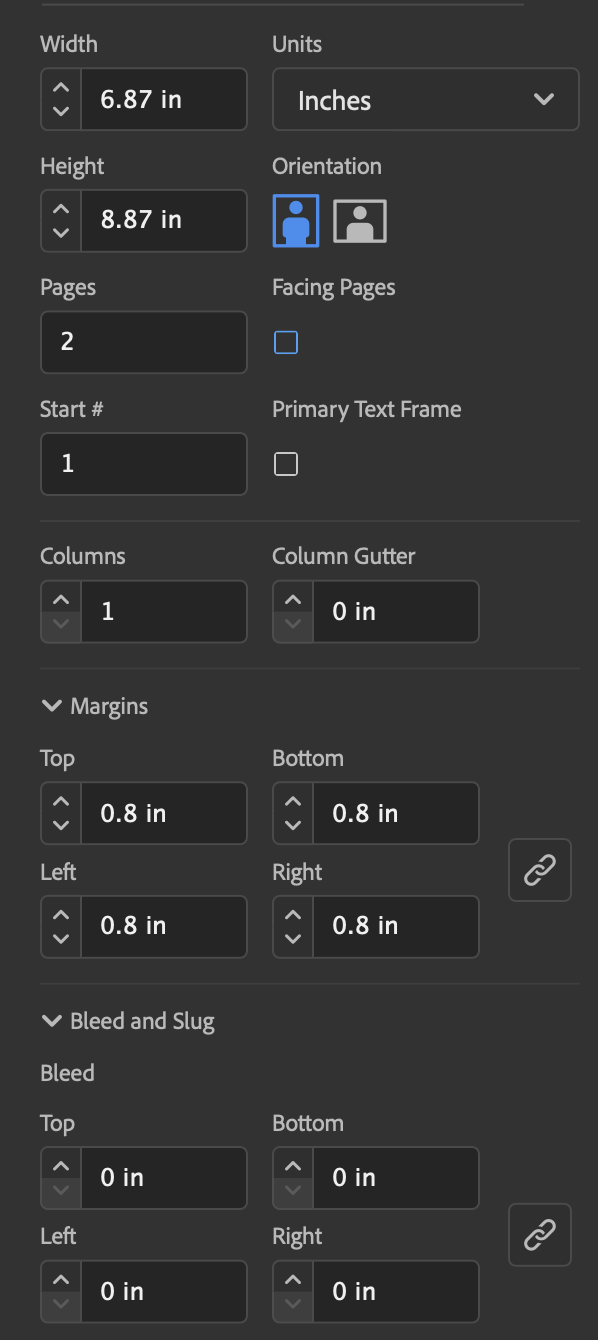
- Create a new InDesign document.
- Enter your total cover width and height as the dimensions.
- Enter 0.8 inches as a margin on all four sides.
- Do not enter any bleed or slug values.
- Click create. You have now created your cover template!
Indesign Cover Template Example (5″ x 7″ Book)

Exporting Your Cover Template as a PDF in Indesign
Please refer to the export instructions toward the bottom of our Interior Page Setup Guide.