Double Page Spread In InDesign
Read on to learn how to create a double page spread in InDesign.

A double-page spread (also known as a crossover) is when an image goes across more than one page, like the art book pictured to the right.
PrintNinja specializes in being able to hit spread placement within a millimeter or two so that the final product looks like one continuous image. In order to facilitate this, we request that projects with crossover artwork be submitted as spreads instead of single pages. This will help us get your project looking exactly the way it should look.
Creating a Double-Page Spread in InDesign
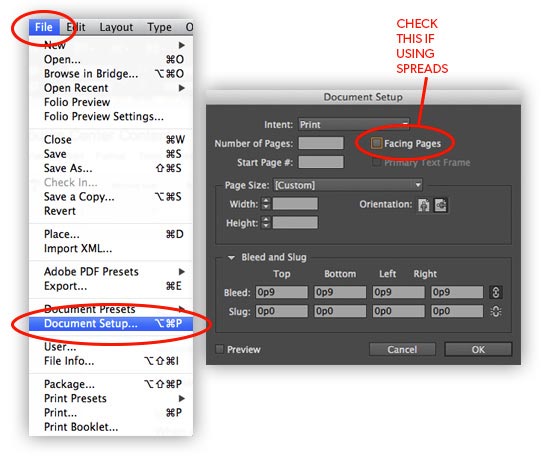
The easiest way to create double page spread in InDesign is to make sure the “facing pages” option is checked when you’re exporting from your graphics program, as in the screenshot below.
If you’re setting up the spreads yourself in a different graphics program than InDesign, it’s important to note that we do not need any bleed in the center, just the standard 1/8″ bleed on all outside edges. Similar to the way you would setup a cover file, you’ll want to include this bleed. While you can use a different program, InDesign is probably the easiest program for this process.