Metallic Ink and Spot Color Setup Guide
Follow along with our metallic ink and spot color setup guide to learn how to correctly prepare your files for printing with PrintNinja.
PrintNinja can print a wide variety of Pantone colors in the Pantone Matching System (PMS). This includes metallics and other specialty inks upon request. Our standard metallic gold is PMS 871 C and our standard metallic silver is PMS Silver 10077 C. You are welcome to utilize unique applications such as tints, halftones, and overprints.
In order to print your book using spot colors, you will need to submit your artwork files with the spot colors already assigned within your document. Be sure to keep the spot colors labeled by their PMS number instead of renaming them within your document. You can refer to the information below for adding a spot color to a document in Adobe InDesign, Illustrator, and Photoshop.
PLEASE NOTE: We CANNOT produce transparencies with Spot Color/Metallic ink.
How to Add a Spot Color in Adobe InDesign
-
- For a video breakdown on setting up your Spot Color in InDesign, check out the following visual guide. More of a textual learner? Have no fear, we also have a full text based guide below!
- Open your Indesign document and from the top navigation bar select [Window > Color > Swatches] to open the swatches panel if it is not already visible.

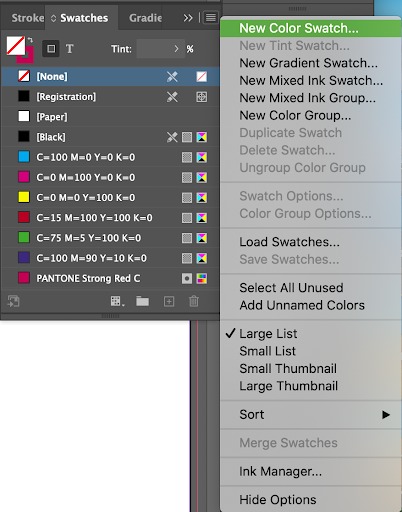
- Click on the fly-out menu at the top-right corner of the swatches panel and select “New Color Swatch”.
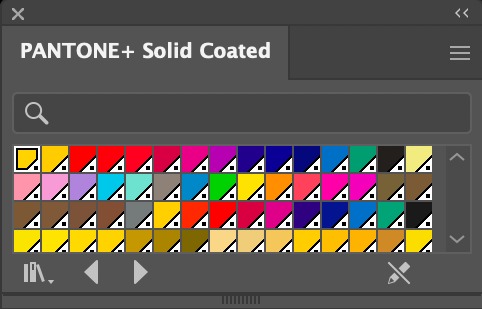
- Set “Color Type” to “Spot” and “Color Mode” to “PANTONE+ Solid Coated” or your preferred Pantone Color Library. Note that you should only select uncoated if you will be printing on an uncoated paper stock.
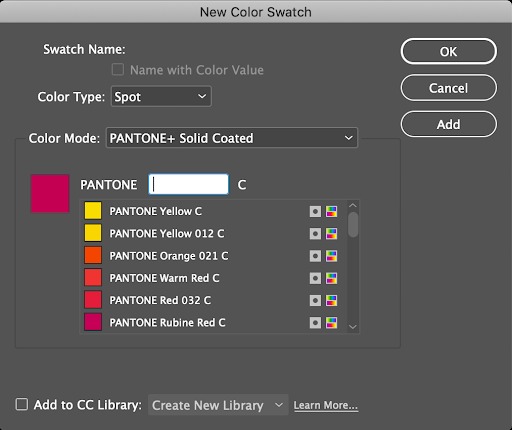
- Use the text box to search or scroll through the list and select your preferred spot color, then click “Add” to add it to your swatches panel.
- Click “Done” when you’ve finished selecting and adding colors. Note that if you open the “New Color Swatch” dialogue box but don’t add a color to your Swatches panel, the button reads “OK” instead of “Done.”
- You can now select your spot color as a fill or stroke from the swatches panel for the text and graphics you would like to print in spot color. Be sure to follow our recommended export settings to ensure your spot colors are exported correctly.


How to Add a Spot Color in Adobe Illustrator
-
- For a video breakdown on setting up your Spot Color in Illustrator, check out the following visual guide. More of a textual learner? Have no fear, we also have a full text based guide below!
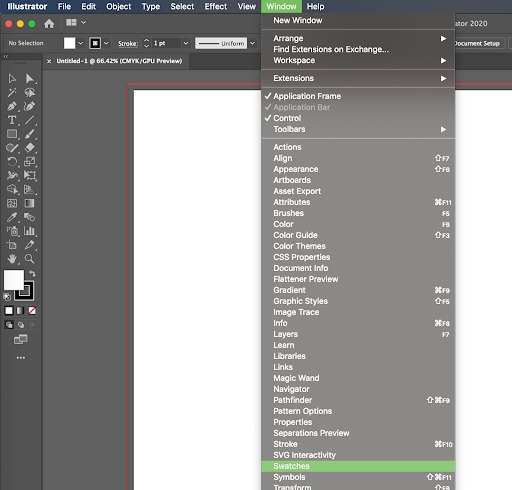
- Open your Illustrator document and from the top navigation bar select [Window > Swatches] to open the swatches panel if it is not already visible.
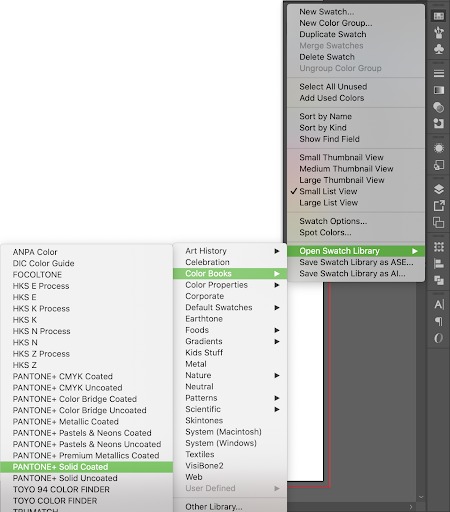
- Click on the fly-out menu at the top-right corner of the swatches panel and select [Open Swatch Library > Color Books > PANTONE+ Solid Coated] or your preferred Pantone Color Library. Note that you should only select uncoated if you will be printing on an uncoated paper stock.
- Use the text box to search or scroll through the list and select your preferred spot color, Hovering over a swatch will display the PMS number and clicking a swatch will add it to your swatches panel.
- You can now select your spot color as a fill or stroke from the swatches panel for the text and graphics you would like to print in spot color. Be sure to follow our recommended export settings to ensure your spot colors are exported correctly.


How to Add a Spot Color in Adobe Photoshop
There are several methods for adding spot colors to documents in Photoshop, many of which can be found through a simple internet search. However, oftentimes it can be difficult for inexperienced users to decipher the optimal solution for their files and ensure the spot color is set up and exported properly. For this reason, our best recommendation for adding spot color to raster-based artwork such as Photoshop files is to use the following instructions which are similar to our other specialty options setup guides.
To print a spot color using Photoshop or other raster-based artwork files you will need to submit two versions of your artwork:
- A full-color (or grayscale) file containing all artwork that will be printed in CMYK.
- A single-color file containing only the spot color element as a solid-black image or text. For multiple spot colors, you will need to submit separate files for each spot color. You will also need to let your account manager or prepress ninja know what spot color you would like printed.
Please see the image below for an example of how your files should be submitted.

Photoshop File Setup Walkthrough
If you are trying to convert color to Spot Color AFTER you have created your artwork, you can follow the below walkthrough for a recommended way to convert artwork to Spot Color.
1. Open your image in Photoshop. We have created an example image below:

2. Click the “Windows” panel at the top of the window.
3. Scroll down and select “Channels”.

4. You will see the “Channels” window open on the right side of the screen. This panel will show 5 separations: CMYK (this is all four colors mixed together), Cyan, Magenta, Yellow, and Black. Given we need to add a SPOT COLOR separation, we will need to add a new separation and also remove the color from the CMYK Channels.

5. First, we will need to select the artwork we would like to be printed in spot color utilizing the magic wand tool.

6. I wish for the “Print” text to be a spot color – PANTONE Red 032 C. Given the artwork is rasterized, I need to set a few setting to ensure the color is fully selected:
✓ Set the “Tolerance” on the top of the screen to “200”
✓ Uncheck “anti-alias”
✓ Check “Contiguous”

7. Now select all of the artwork using the magic wand tool.

8. Next, click the “Save the selection as channel” icon.

9. Make sure to click on the new channel. Once you have selected the channel, cype “Command + D” to deselect the image. Then type “Command + I” to invert the selection.

10. Double-click the channel to bring up the color options. In the new panel:
✓ Name the color your selected spot color
✓ Make sure “Spot Color” is selected
✓ Double-click the color box and add in the Spot Color information.
✓ Make sure “Solidity” is 100

11. Now click “Command” and then the new channel to select the spot color artwork.
12. Hide the spot color channel and turn on all of the CMYK channels.
NOTE! Make sure the background color is WHITE.

13. Click the “C” channel and type “Command + Delete”. This will fill the text with white.

14. Repeat this process for “M”, “Y”, and “K”.
NOTE! Make sure the white is 100% by viewing it in the “Info” panel:

15. Now you should be all set! Be sure to follow the “Export Settings” as highlighted on this page.