Perfect Bound Glue Area Design Considerations
When perfect bound books are assembled, there’s a small area between the inside cover pages and the first and last interior pages that will be glued together, so everything on those four pages should be kept at least 10mm away from the trim line on the binding side on those pages.
To aid in further explaining, we have provided a visual comparison of a production file spread PDF vs the actual manufactured print.
For a video breakdown of the safety area + danger zone for casebound books, check out our visual guide:
See below for the production file PDF example:

See below for the actual printed project:

There’s more info about this on the bottom of our softcover setup guide page.
Be mindful that due to the nature of perfect bound books, content that is very close to the binding area may be obscured. Please keep any important text and artwork 10mm (0.39 inches) away from the bound edge (the center of the page for two-page spreads) to be fully visible.
To aid in further explaining, we have provided a visual comparison of a production file spread PDF vs the actual manufactured print.
See below for the production file PDF example:
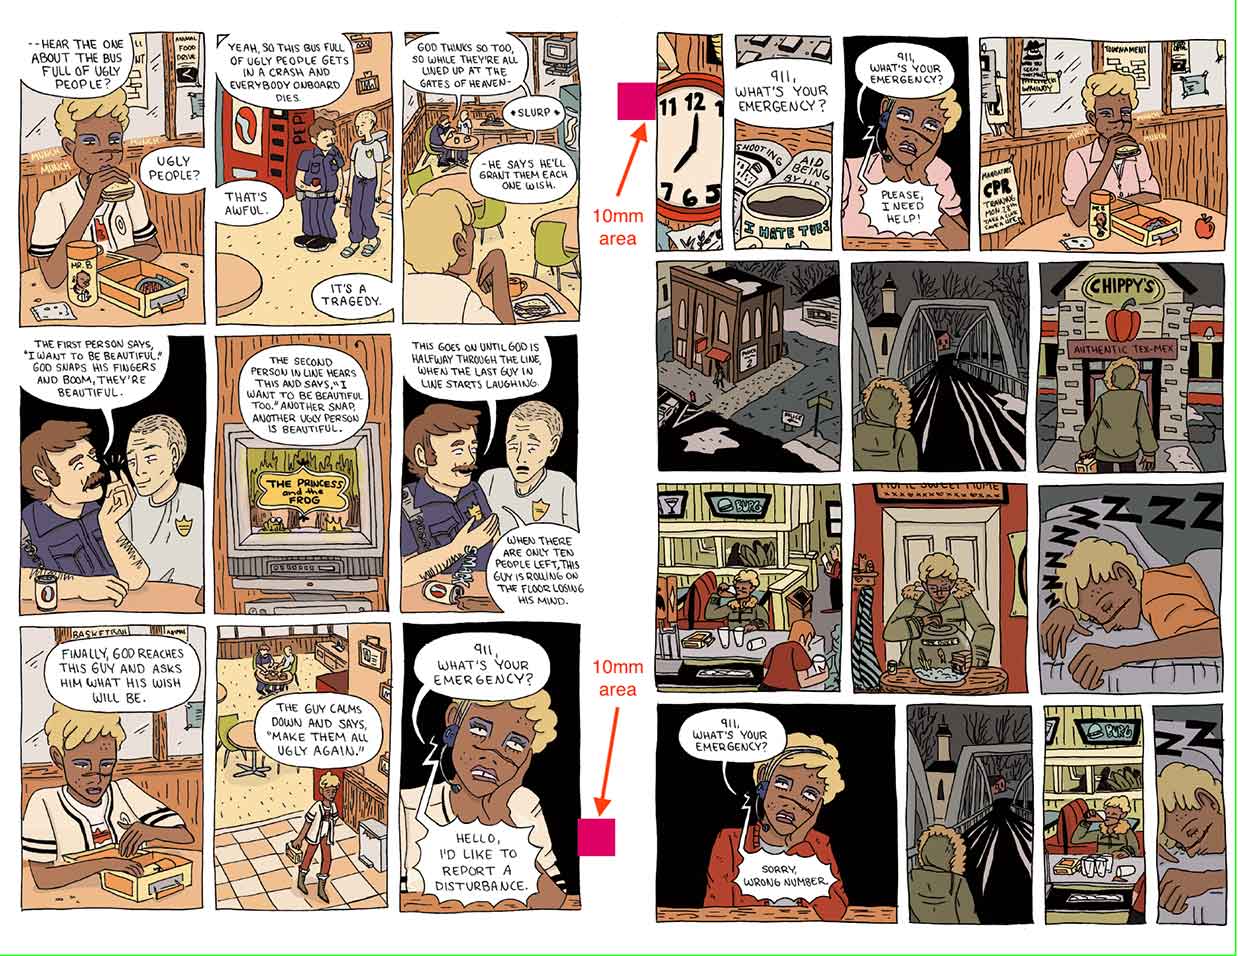
The magenta boxes highlight the 10mm “danger” area on either side of the binding.
See below for the actual printed project:
