Hardcover Book Hinge Area Setup Guide
Learn how to setup your files properly with our hardcover book hinge setup guide.
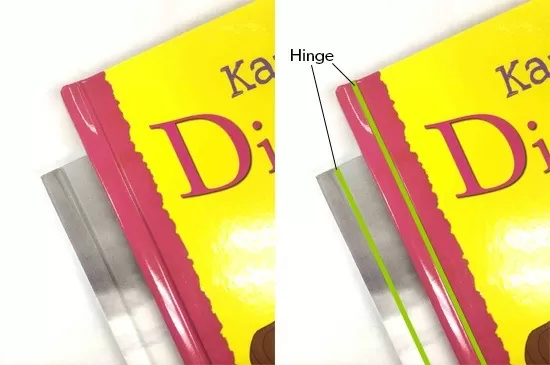
When hardcover books are produced, there’s a small indentation on the front and back cover. This helps the book open and close without causing damage to the covers or the spine. This area is called the “hinge.”
In order to accommodate for the hinge, allow for 0.4 inches additional space on both the front and back cover, as you can see in our hardcover artwork setup guide.
You do not need to draw any permanent lines for the hinge on your files – but it may be useful to draw layout lines in your layout software so that you do not inadvertently cross over into this space.
How do designers treat the hinge area?
In general, most designers keep important graphical elements out of the hinge, since the hinge will shrink and contract in the hardcover binding process. All-over art or background art is generally considered to be just fine.
We especially recommend that you keep text elements such as your title out of the hinge, since elements that run into the hinge may change proportion somewhat due to its concave shape. You’re better off centering these objects starting from the edge of the hinge instead.
Finally, we suggest that you avoid spot UV or foil stamping in the hinge area. These special treatments are durable on flat surfaces, but are not designed to handle the flexing activity that the cover hinge endures.
Following the instructions in this hardcover book hinge setup guide will allow you to get a great looking final product.